Imagine having the power to elevate your living space with warmth, efficiency, and style – all at your fingertips. Electric radiator installation is no longer a daunting task but a simple process that can transform your home’s comfort.
Our premium radiators offer more than just heat; they provide customised warmth, energy-saving efficiency, and a sleek aesthetic that complements any decor.
Whether you’re a first-time radiator installer or seeking to upgrade your existing system, our 11 pro tips will guide you through a seamless installation process. Bid farewell to the complexities of the past and embrace a hassle-free journey towards a cosy, energy-efficient, and visually appealing living environment.
Pre-Installation Considerations
Before diving into your electric radiator installation, getting everything ready is important. Here’s what you need to know and have on hand:
List of Tools and Materials Needed for Pre-Electric Radiator Installation
- Measuring tape: To measure the space where you’ll install the radiator.
- Drill: To make holes in the wall for the radiator brackets.
- Screwdriver: To tighten the screws that hold the radiator in place.
- Wall plugs and screws: These will secure the brackets to your wall.
- Level: To ensure your radiator hangs straight.
- Pencil: For marking where to drill holes for the brackets.
Choosing the Right Electric Radiator (5 Easy Reminders)
- Measure the space: Ensure the radiator will fit where you want it. This is your first step in installing a new radiator.
- Consider the style: Radiators come in various designs. Choose one that matches your room’s look.
- Think about efficiency: The right size and type of radiator will heat your room efficiently.
- Location, location, location: For the best performance, place your radiator under a window or on the coldest wall of the room.
- Easy access: Make sure you choose a spot that’s easy to reach for any future radiator installation adjustments or maintenance.
Remember, installing radiators can be straightforward with a bit of planning. Whether you’re installing a new radiator or looking into how easy it is to change a radiator, these steps will ensure a smooth electric radiator installation process.
Electric Radiator Installation: An 11-Step Guide
Embarking on a DIY electric radiator installation project can be both rewarding and cost-effective. However, recognizing when to enlist the expertise of a professional is equally crucial to ensure safety and optimal efficiency.
This comprehensive guide will navigate you through the process of electric radiator installation, encompassing best practices and highlighting instances where seeking professional assistance might be the prudent choice.
1. Planning Your Space
The foundation of a successful installation lies in meticulously planning the best location for your radiator. Consider the areas where you spend the most time to maximise warmth distribution. Measure carefully to ensure a perfect fit. This preparatory step can preempt potential time and hassle if the new radiator’s placement is chosen correctly.
2. Safety First
Safety should be the paramount consideration, especially when dealing with electrical installations. Always remember to turn off the electricity at the main switch before commencing any work. Utilise a voltage tester to confirm that no current is flowing in the area where you’ll be working.
For those who are less confident in managing electrical components, this is a good time to consider enlisting the services of a professional electrician. Prioritising safety and ensuring that the electric radiator installation adheres to all relevant codes and regulations is of utmost importance.
3. Unboxing and Inspection
Once you’ve ensured a safe working environment, carefully unbox your radiator and inspect all components meticulously. Cross-reference the included list to verify that all necessary parts are present and intact.
The manual handbook will be your invaluable companion throughout this process; it contains specific instructions and safety information tailored to your particular model. Familiarise yourself with its contents before proceeding.
This step underscores the importance of diligence in the DIY radiator installation process and why, in certain instances, having the oversight of a professional can be invaluable, especially for bespoke or complex models.
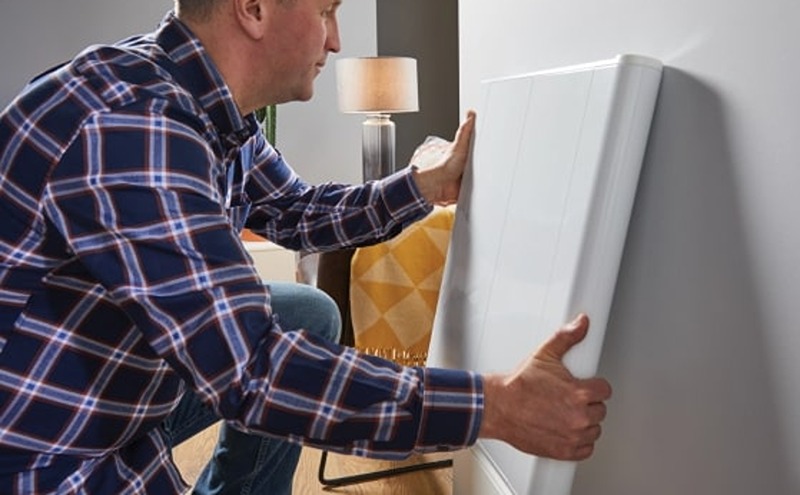
4. Mounting the Brackets
Measure and mark where the brackets will go as per manual instructions. Utilise a drill to securely fix the brackets to the walls. Uneven brackets can cause improper installation. Consulting a professional can prevent wall damage and ensure safe, secure radiator mounting.
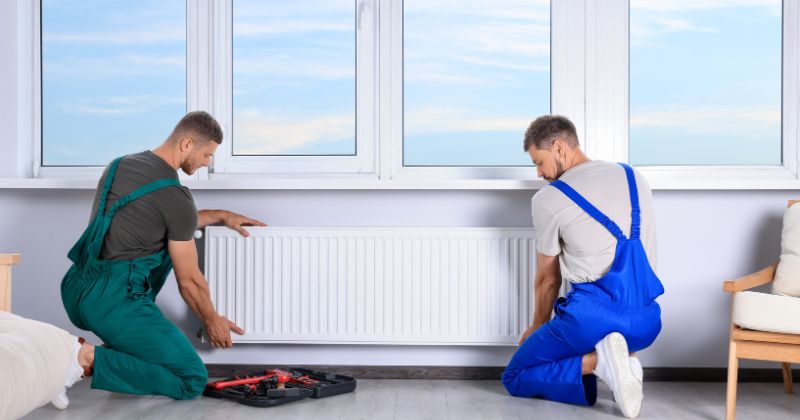
5. Hanging the Radiator
With the brackets in place, carefully hang the radiator, ensuring it’s securely attached and level. This might require extra hands, so don’t hesitate to ask for help. This step shows how DIY can sometimes benefit from teamwork or professional assistance, particularly with larger radiators.
6. Electrical Connection
Depending on your specific model, you may be able to simply plug in or hardwire your radiator. If hardwiring into your home’s electrical system is required, it is strongly recommended to enlist the services of a qualified electrician, as this task requires specialised expertise.
Proper electric radiator installation needs blending DIY and professional skills for safety.
7. Setting Up Controls
Whether it’s a manual dial or a smart thermostat, setting up your controls correctly is key to efficient operation. Follow the manufacturer’s instructions carefully.
While this process is usually straightforward, if integrating your radiator with a smart home system, you might consider seeking professional assistance to ensure seamless operation and compatibility.
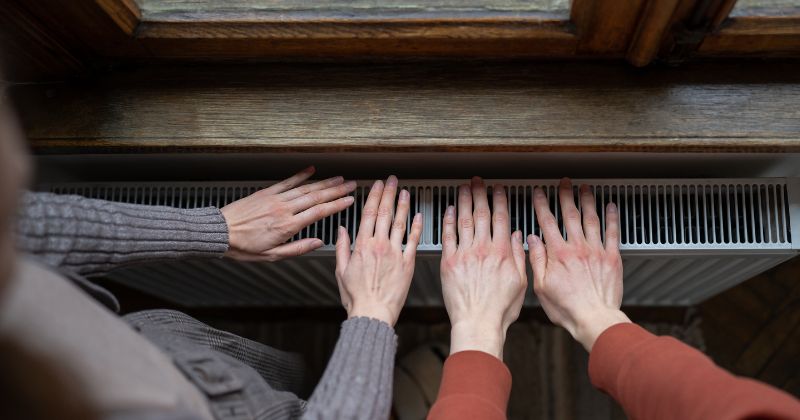
8. Testing the Installation
Once everything is connected, switch the power back on at the mains and test your radiator. Check for any issues and ensure the radiator heats up as expected.
This is the moment of truth and will highlight the success of your installing radiators effort.
9. Energy Efficiency Tips
Optimise your radiator’s efficiency by setting it to a comfortable temperature and not overloading the system. Regular maintenance can also prolong its lifespan and efficiency. These tips are straightforward but essential for maximising the benefits of your new heating solution.
10. Maintenance Overview
Regularly clean your radiator and check for any signs of wear or damage. Simple maintenance can often be managed DIY, but don’t hesitate to contact a professional for any complex issues.
11. Troubleshooting Common Issues
Familiarise yourself with common issues and their solutions as outlined in the manual. For more complex problems, professional help is advised to prevent damage or inefficiency.
Post-Installation Tips
Once you’ve successfully completed your electric radiator installation, there are a few more steps to ensure its longevity and efficiency. These tips will help you make the most of your new heating solution.
Product Registration and Warranty
After installing your new radiator, it’s important to register your product with the manufacturer. This step ensures that your radiator is covered under warranty. A valid warranty can save you time and money if any issues arise.
It also allows you to receive updates on maintenance and product enhancements. Keep your purchase receipt and warranty information safe for future reference.
For Best Electric Radiators, you may review our warranty guidelines across our product collection. You may contact us on our website or for a prompt discussion of your questions.
Maintenance Recommendations
Regular maintenance is key to keeping your radiator running efficiently. Start by checking and cleaning your radiator at least once a year. This involves dusting the fins and ensuring no furniture is directly blocking the unit.
For more detailed maintenance, refer to your user’s manual. It will provide specific instructions based on your model. If you notice any unusual noises or performance issues, it might be time to call a professional for a check-up.
Integrating with Home Automation
Modern electric radiators often come with smart features that allow for integration with home automation systems. This means you can control your heating remotely, set schedules, and even adjust temperatures for individual rooms.
To get started, consult your radiator’s manual to understand its smart capabilities. Then, choose a compatible home automation system or app.
Integration can help you manage energy usage more effectively, ensuring your home is warm when you need it to be without wasting energy.
Do You Need an Electrician to Install Electric Radiators?
Whether you need an electrician for electric radiator installation depends on several factors. Let’s break down the scenarios where professional help is recommended versus when you can manage the installation yourself.
When DIY Might Be Suitable
For simpler radiator installations that don’t modify your home’s electrical system, a DIY approach may work if you follow instructions carefully.
Plug-In Radiators
If the radiator is designed to plug into an existing socket, you might not need an electrician. These types of plug-in radiators are designed for easy installation and often just need to be mounted on the wall and plugged in.
Replacing an Existing Radiator
If you’re installing a new radiator in place of an old one and don’t need to modify the electrical supply, the process is generally straightforward and might not require professional help.
No Structural Changes Needed
When the installation does not require any changes to your home’s electrical wiring or structure, such as drilling through walls to run new cables, you might be able to do it yourself following the manufacturer’s instructions.
When You Should Hire an Electrician
Installing electric radiators can involve complex wiring that connects to your home’s electrical system. For complicated installations that require hard wiring or integrating the radiator with a smart home system, it’s safest to hire a professional electrician who has the expertise to complete the job properly.
Safety should be the top priority, so for any installation where you have doubts about the existing wiring, especially in older homes, or if instructions are unclear, it’s better to use a certified electrician.
1. Complex Installations
If the installation requires hard-wiring to your home’s electrical system rather than plugging into an existing outlet, it’s safer to hire a professional.
Installations that involve integrating the radiator with a smart home system may also require the expertise of an electrician.
2. Safety Concerns
Any doubts about the wiring in your home, especially in older buildings where the electrical system may not meet current standards, should prompt you to call in a professional.
If the installation instructions are unclear or if you’re unsure about your ability to follow them safely, it’s better to err on the side of caution and hire an electrician.
3. Specific Local Regulations
Some areas have strict local regulations about who can perform electrical work. Check your local laws—many require that only a certified electrician carry out installations that involve electrical connections.

Making Your Home Warmer with Electric Radiator Installation
We hope this guide has given you the confidence to tackle your electric radiator installation. Whether it’s a brand-new setup or an upgrade, we’ve laid out each step to ensure a smooth process. While professional help may be needed for wiring, many steps can be easily managed independently.
The tips we’ve shared are designed to guide you, whether it’s your first time installing a radiator or if you’re updating your system. Safety should always come first. If you’re ever unsure, getting expert advice is a smart move. With careful attention, your new radiator will provide warmth for years.
After installation, remember the key steps for maintaining your radiator. This includes registering your product and keeping up with maintenance. Smart radiators offer additional benefits like remote control and scheduling.
Ready to upgrade your home heating?
Explore our Best Electric Radiator Collections in the UK. Find stylish radiators for any room and smart devices for effortless control. Our team is here to help you find the ideal radiator, ensuring comfort and efficiency for the seasons to come.
FAQs
Do You Need an Electrician to Install an Electric Radiator?
No, not always. You can install plug-in models yourself. For hard-wired models, you might need an electrician.
Do Electric Radiators Have to Be Hard Wired?
No, they don’t. Many electric radiators are plug-and-play, but some models require hard-wiring.
What Are the Tools Needed for Electric Radiator Installation?
You’ll need a drill, screwdriver, measuring tape, level, wall plugs, and screws.
How Long Does It Take to Install an Electric Radiator?
It usually takes no more than 10 minutes, depending on the installation type and your experience.
Can Electric Radiators Be Installed in Bathrooms?
Occasionally depending on the IP rating. Towel rails are often used in bathrooms as they heat and dry towels while giving ambient heat to the room. Please check the range is suitable for bathroom use and follow safety guidelines.
Is It Easy to Move an Electric Radiator Once Installed?
Yes, plug-in models can be moved easily. Hard-wired models will require some work.
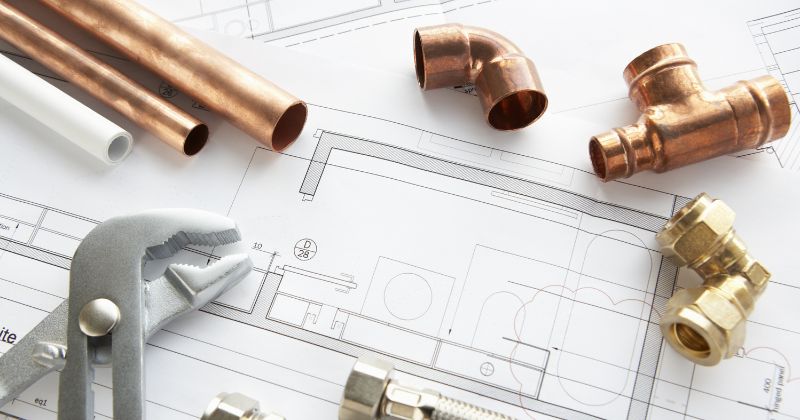
Do Electric Radiators Need Plumbing In?
No, electric radiators do not require plumbing. They operate independently of your home’s heating system.


Leave a Reply